Difference between revisions of "Multi-story housing"
Jump to navigation
Jump to search
Firestarter (talk | contribs) (→Skill needed: Corrected minimum skill for placing roof on a one story building) |
|||
| Line 79: | Line 79: | ||
== How to make another floor == | == How to make another floor == | ||
| − | # Plan and completely build the | + | # Plan and completely build the first floor outer walls. |
| − | # | + | # Activate a mallet on a tile below and plan floor above |
| − | + | # Plan at least one tile with an opening above to make a ladder for a spot to climb up to upper floors. You can later destroy it and replace with a staircase if you wish. | |
| − | + | # Build the floors from below. | |
| − | + | # Use the ladder to get up to upper floor. | |
| − | # Plan | + | # Activate a mallet, right click tile borders to plan walls. |
| − | # Build | ||
| − | # Use ladder to get up to upper floor. | ||
| − | # | ||
=== Notes === | === Notes === | ||
* In-game descriptions describe the bottom floor as being the 1st, which is a US standard. Therefore the Wurmpedia will describe this as such. The use of the term ground floor or ground will be kept to a minimum. | * In-game descriptions describe the bottom floor as being the 1st, which is a US standard. Therefore the Wurmpedia will describe this as such. The use of the term ground floor or ground will be kept to a minimum. | ||
| − | |||
* You can not build floors above fences, walls or parapets. | * You can not build floors above fences, walls or parapets. | ||
* You can drag [[Cart|carts]] up ladders to get them to an upper floor. | * You can drag [[Cart|carts]] up ladders to get them to an upper floor. | ||
| Line 100: | Line 96: | ||
* Where a mallet is mentioned a [[hammer]] can be used in its place. | * Where a mallet is mentioned a [[hammer]] can be used in its place. | ||
* When you destroy a structure all items on upper levels will fall to the ground. | * When you destroy a structure all items on upper levels will fall to the ground. | ||
| − | * | + | * Wall types can be found on the [[Wall]] page. |
== Floor and Opening types == | == Floor and Opening types == | ||
Revision as of 00:34, 25 April 2018
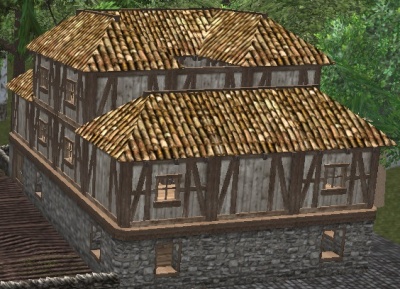
Multi-story structures can only be built on flat tiles.
Contents
Skill needed
The more floors your house has, the more skill is needed; see the table below for the required skill levels. Only the first (ground) floor planning needs 1 carpentry skill per wall and 1 skill per tile. With 5 skill a roof may be placed over the first floor, but not an opening or floor above. For upper floors, the roof counts as a floor (although it may have less of a skill requirement than an opening or floor above - unconfirmed).
- You may have a total of 16 floors (counting ground level as the first floor)
- Carpentry is checked for planning each floor and building wooden floors, openings, staircases, walls, and fences.
- Paving is required for stone floors, openings, and staircases.
- Masonry is required for stone walls, fences, parapets, as well as pottery and slate roofs.
- Thatching is required for thatch roofs.
|
|
|
Adding a roof
- Plan and completely build the walls.
- Use a mallet to plan the ground floor.
- Use mallet on tile below and plan floor below.
- Then plan roof above.
- Use mallet on tile below and plan roof above.
- Build them.
How to make another floor
- Plan and completely build the first floor outer walls.
- Activate a mallet on a tile below and plan floor above
- Plan at least one tile with an opening above to make a ladder for a spot to climb up to upper floors. You can later destroy it and replace with a staircase if you wish.
- Build the floors from below.
- Use the ladder to get up to upper floor.
- Activate a mallet, right click tile borders to plan walls.
Notes
- In-game descriptions describe the bottom floor as being the 1st, which is a US standard. Therefore the Wurmpedia will describe this as such. The use of the term ground floor or ground will be kept to a minimum.
- You can not build floors above fences, walls or parapets.
- You can drag carts up ladders to get them to an upper floor.
- You can fall and take damage from upper floors if there is no wall/fence of roof to stop you. (Please be careful as people have died in 1 fall from 4th floor drops)
- Ladders will always be on the south side of the opening.
- The 1st floor must be complete before walls on the 2nd can be planned. This is not true, however, of any additional floors.
- Where a mallet is mentioned a hammer can be used in its place.
- When you destroy a structure all items on upper levels will fall to the ground.
- Wall types can be found on the Wall page.
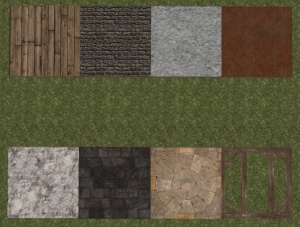
Floor and Opening types
Roof types
Fence types
Wooden parapet -- More info needed
Stone parapet -- More info needed
Stone and iron parapet -- More info needed
More Info
For More Images and Info please check:
and

